How to tighten the flywheel on a Rush Evo, MT 2, and Nitro 3 Evo
Tools required:
Phillips screwdriver
Flat bladed screwdriver
8mm socket
Pipe wrench
This tutorial shows you, step by step, how to tighten the flywheel on the T-15 engine. This tutorial shows the Nitro Rush Evo but the principle is the same on other T-15 engine cars, it is just the engine removal that is different. Please refer to your instruction manual for engine removal on these models.
The flywheel provides momentum to keep the crankshaft of the engine turning. If the flywheel has worked its way loose it will cause poor running of the engine and will make the engine difficult to start.
1.ENGINE REMOVAL
First you need to remove the engine from the car.
Remove the engine from the car by taking out the four screws securing it to the chassis (PICTURE1) and also remove the screw securing the exhaust to the chassis (PICTURE2). Disconnect the fuel line from the carburettor and the link from the throttle/brake servo to the throttle arm. The engine and exhaust should now come away from the car. (PICTURE3)

(picture 1)

(picture 2)

(picture 3)
2.REMOVAL OF CLUTCHBELL AND CLUTCH SHOES
Undo the screw holding the Clutch bell to the engine (PICTURE4), and then lift away the Clutch bell and the needle roller bearing from the pilot shaft.
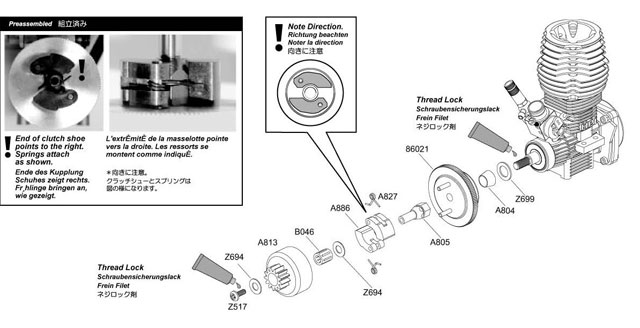
Insert a flat bladed screwdriver underneath the clutch shoe springs and apply very gentle pressure to lift them. Take care to note the direction that the shoes are facing, and also note how the springs fit onto them.

(picture 4)
3.FLYWHEEL NUT
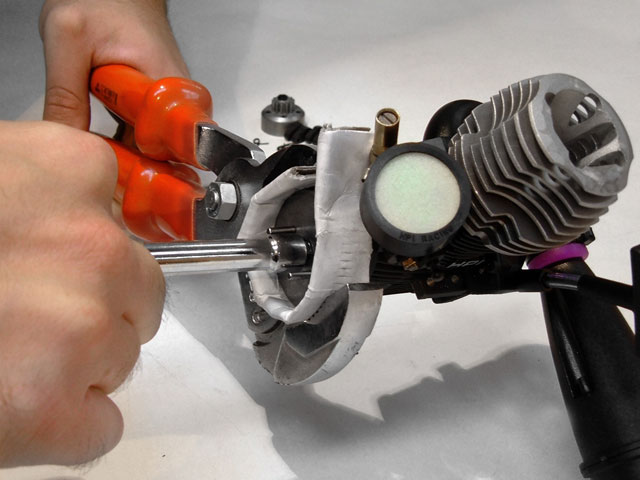
Now you can see the nut that holds the flywheel on. You should first remove this nut by holding the flywheel with a pipe wrench (we wrap a piece of thin cardboard around the flywheel to prevent it being marked) and undo the nut with a 8mm driver, turning anti-clockwise.
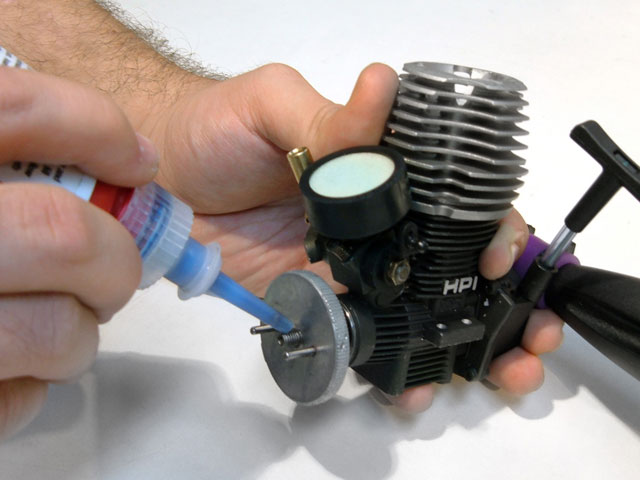
Now apply a small amount of removable thread lock to the threads on the crankshaft where the nut sits. The thread lock will prevent the nut coming loose due to vibrations from the engine. (PICTURE5)
Now refit the nut using the pipe wrench, card and 8mm socket. (PICTURE6). You should make sure this part is fully tight so that the flywheel doesn't slip.

(picture 5)

(picture 6)
4.REBUILD
You can now refit the clutch shoes and springs to the flywheel, the assembled clutch should look like this (PICTURE7). Then reassemble the Clutch bell with the washers and the needle roller bearing. Refit the engine into the car, putting removable thread lock on the 4 screws that hold the engine in, and connect the fuel lines and throttle arm and that's it!
The car is now ready to run again.

(picture 7)


